Probably one of the hottest side hustles going around right now is retail arbitrage. You’re probably wondering if retail arbitrage can be successful and how to go about it if so. Well, I tried retail arbitrage on Amazon and here is the true story about what I discovered.
The Idea of Retail Arbitrage
Retail arbitrage is becoming a common side hustle due to huge slashing of prices at big box stores. Many popular stores have clearance racks or every day sale prices that are much lower than what an item sells for on Amazon or Ebay.
For the purpose of this article we will focus on Amazon, as that is generally regarded as the most profitable marketplace for retail arbitrage.
The idea is that you can go to a big box store, purchase an item on clearance or on sale for very cheap, and resell it online for a profit.
Yes, of course there are many items that are not profitable whatsoever. However, there are strategies you can use that many side hustlers have found to be helpful when determining what will sell and how much you will make.
In fact, Amazon allows you to put in projected purchase prices and estimates fees required to sell the item prior to you even purchasing said item.
Now that you understand the idea of retail arbitrage let’s talk about how to fire up this side hustle and whether or not you can truly make money doing it.
Researching The Process
Make sure to do plenty of research on retail arbitrage to come up with your own unique formula of ideas. When I first tried retail arbitrage I wanted to make sure I had as much information as possible going in so I didn’t lose any money after marking up my products.
I know that you already are in the research phase because that is probably what has led you here to this article.
I found multiple great sites that were extremely helpful when learning retail arbitrage. In addition, there are a few educational resources out there like this that teach you exactly what you need to look for when first tackling this endeavor.
However, if you don’t want to spend the time searching through hundreds of websites and learning exactly what each person did, you can just continue reading here and I will outline how to go about making this happen as best as possible.
Preparing my Amazon Store and FBA Account
The first thing you will want to do is prepare an Amazon Seller account. Many folks that have written about retail arbitrage are not up to date and have said that an Amazon Seller account is free. However, this has changed over the years and as third party sellers become more popular on Amazon (around 51% of total sales at the time of writing), Amazon has chosen to raise the price of even the base membership to $40 per month and there is no way around it.
Preparing this account is simple…
First, head over to Seller Central at Amazon and create an account.
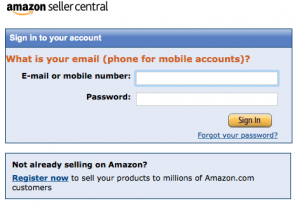

You will then be asked for the membership option you prefer, your store name, and some additional information about how many items you expect to list, preliminary information on what types of items you might sell, and some miscellaneous tax reporting information so that you pay the government based on what you make.
Note: Keep receipts when you purchase items so that you can deduct the cost of your inventory items when it comes tax time.
After you get the store all setup and pay your $40 start up fee, you will need to verify your account with a form of State Issued ID.
This whole setup process only takes approximately 10 minutes or so regardless of how long winded I’ve made it sound.
Next, you’ll want to download the Amazon Seller app on your phone since we are about to go mobile. It’s easy enough to find in the AppStore, just search Amazon Seller and it should pop up as shown:
Now that you have your account setup and the app downloaded, we are ready to start sourcing items.
Sourcing My Items
You’ll want to make sure to pay close attention to this section as this is when stuff can get a bit confusing if you don’t know what you are looking at.
Make sure you don’t just run into the nearest Walmart and start grabbing every item you see on the Clearance rack as this process does not work like that.
Instead, make sure to do the proper research as outlined in this section. There are a few different stores that seem to be popular for retail arbitrage, for the sake of this article, however, I tested Walmart and Target.
If you are interested in trying this with different types of items not necessarily sold at Walmart or Target you can always try these big box stores:
- Costco
- Home Depot
- Lowe’s
- Sam’s Club
So now that you have a few ideas of stores to tackle, let’s talk about how to go about confirming an item is a good inventory item to sell on Amazon.
First, you will want to have a fully charged phone because the Amazon Seller app can be quite harsh on the battery. Once you get inside a store you want to be able to hit all the sales/clearance racks without having to leave and return at a later time because you never know that the items currently in the store will still be there.
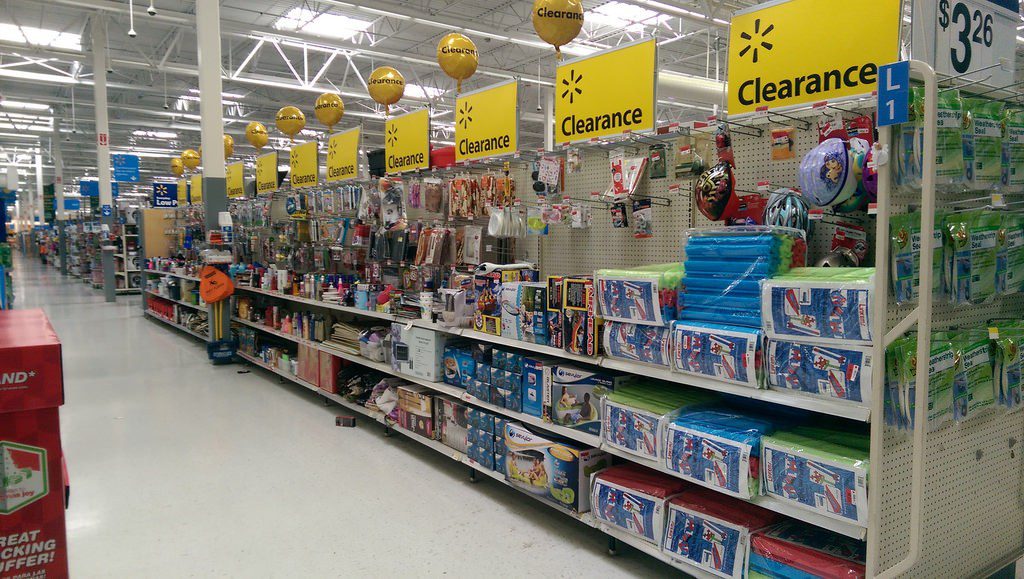
Once you have located a clearance rack, you’ll want to pull out your phone and Amazon Seller app. At first I was concerned that Walmart employees were going to start staring or get paranoid of my antics, but they could care less what I was doing so don’t worry.
With the Amazon Seller app open you will want to click on the photo icon at the top right corner of the app. This will open up a photo pane and allow you to scan barcodes and products to identify them on Amazon and make comparisons regarding price, how many competitors exist, selling popularity, and fees.
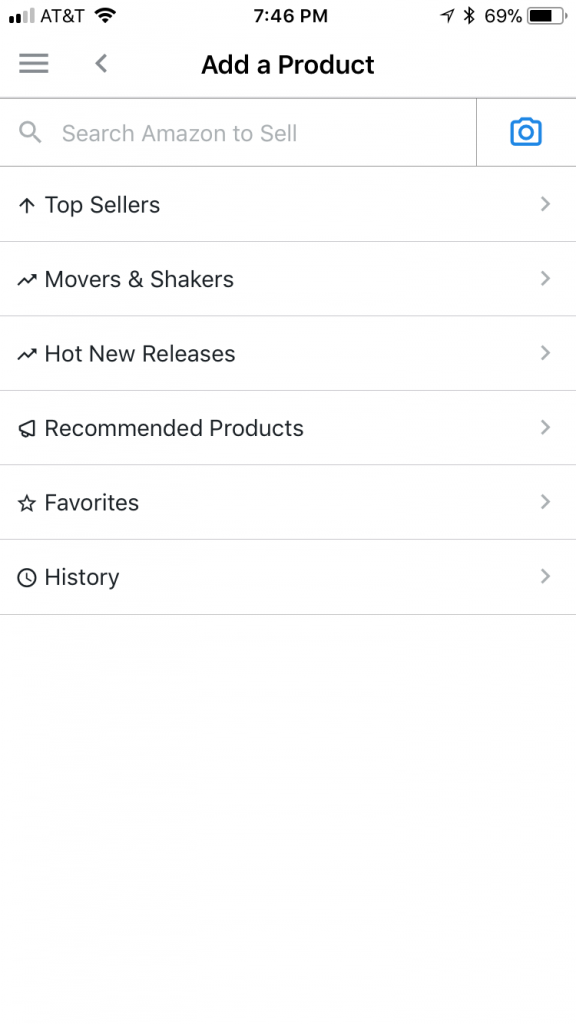
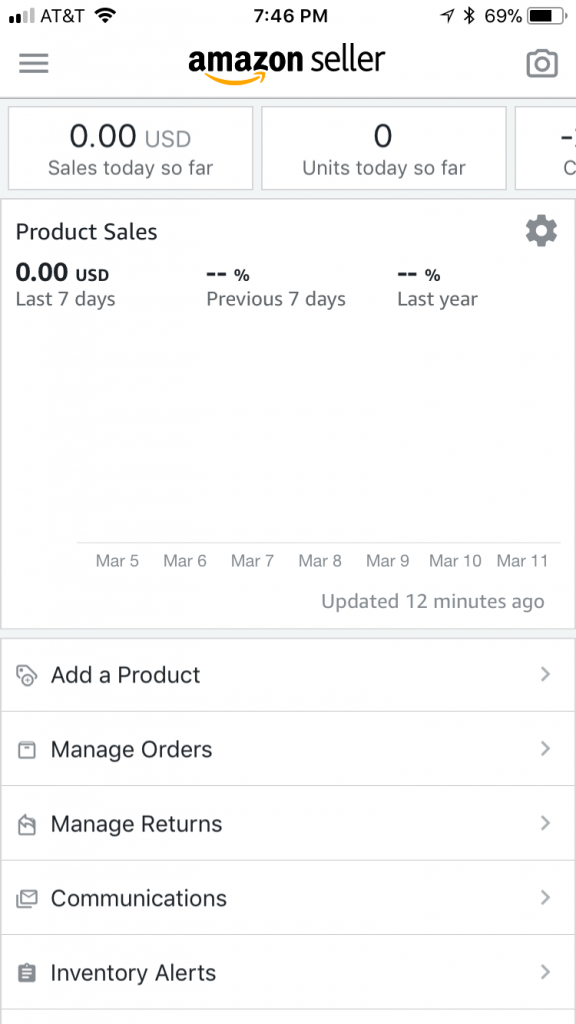
First you will want to check popularity of an item as shown in the photo below. I’d suggest when starting out you will want to stick to selling items in the top 200,000 or so in their respective department. If an item is slow moving or ranked very low, you may never sell the item and your return on investment may come 2 years down the road after you’ve long forgotten about retail arbitrage.
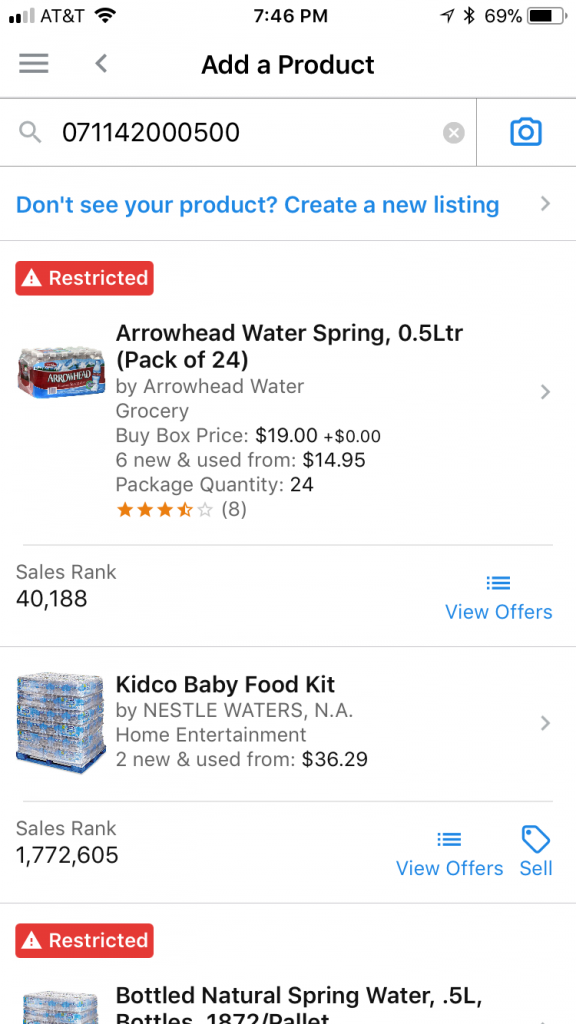
Next, look into the price of the item. If you see that the selling price on Amazon is remotely close, or even lower than the clearance price of the item, ditch it immediately and ignore that item.
At first, I would suggest scanning everything on the rack, but as you get better at retail arbitrage you will start to ignore things that you know aren’t going to be profitable. This is a skill that is developed over time, not immediate, so make certain to follow the steps closely.
After you have looked at the price, and polarity, click on the item to confirm that it’s not restricted as shown below. If the item is restricted, you may not be able to sell it on Amazon therefore there is no reason to look at the item any longer.
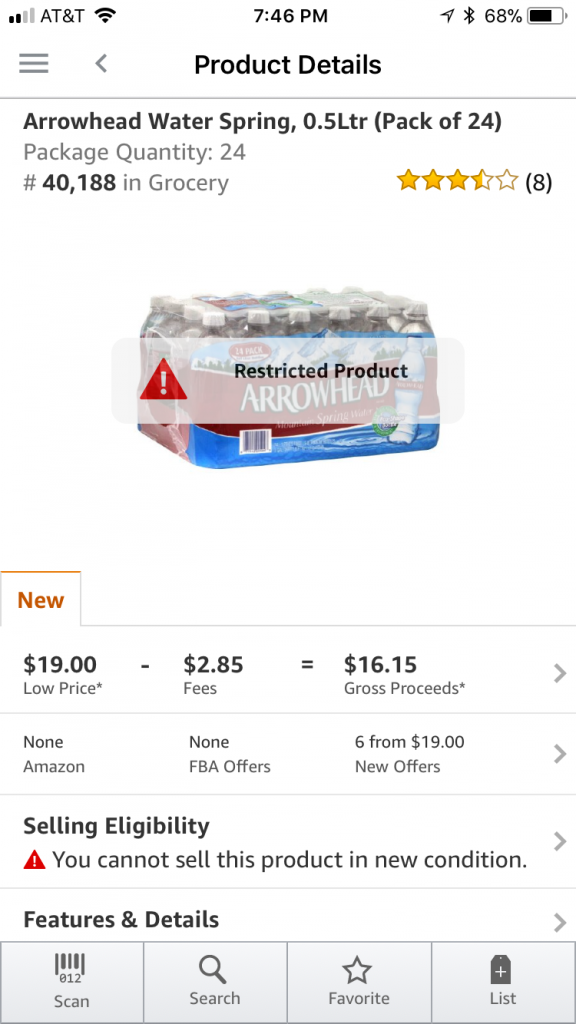
Okay, so now you’ve found an item that is low enough priced on clearance, is relatively popular, and not restricted. Great! You may have found your first item.
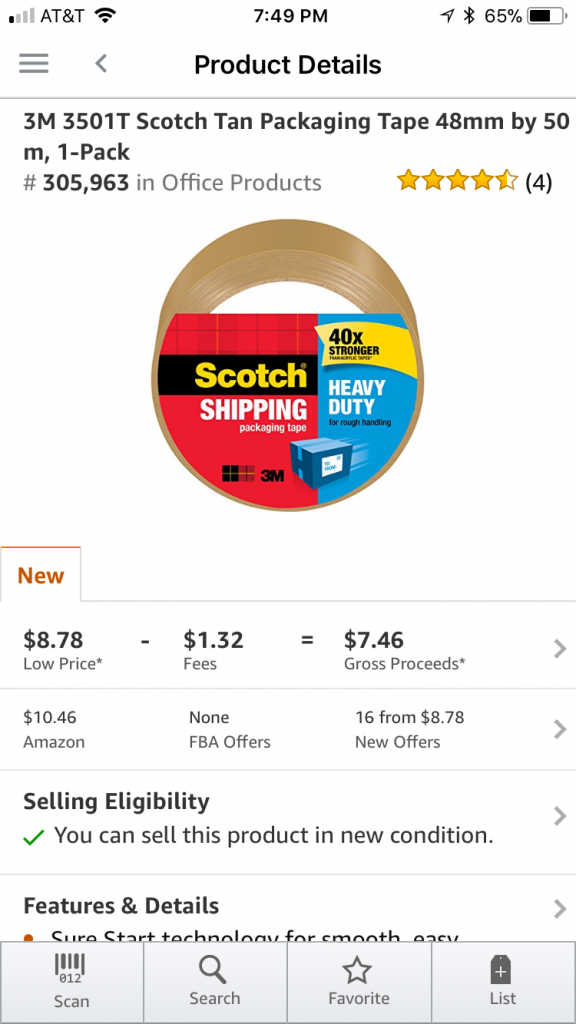
Now click through the item and look at the multiple options for fulfillment of the item. You should see the screen showing Fulfilled by Seller and Fulfilled by Amazon (FBA).
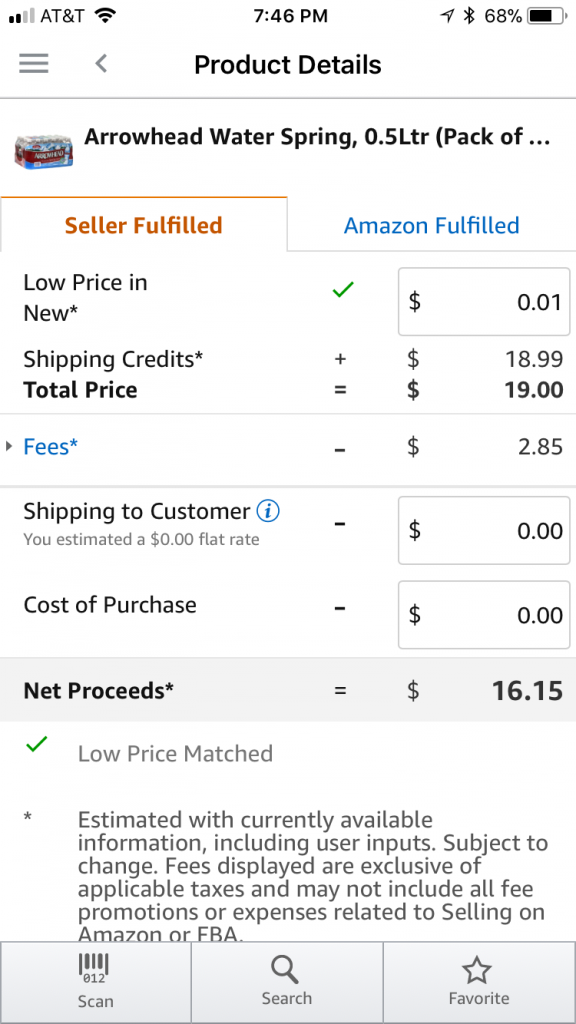
When you fulfill a product by Amazon, this can qualify it for Prime two day shipping, Amazon will handle all the customer service and returns, and it really makes the entire process much easier. That’s why I chose the FBA route for my experience.
So continuing with the item you have selected, click through the item to the Fulfilled by Amazon tab.. now you should see a screen outlining the details of the Buy Box (the main sellers item box) and other competitive low prices.
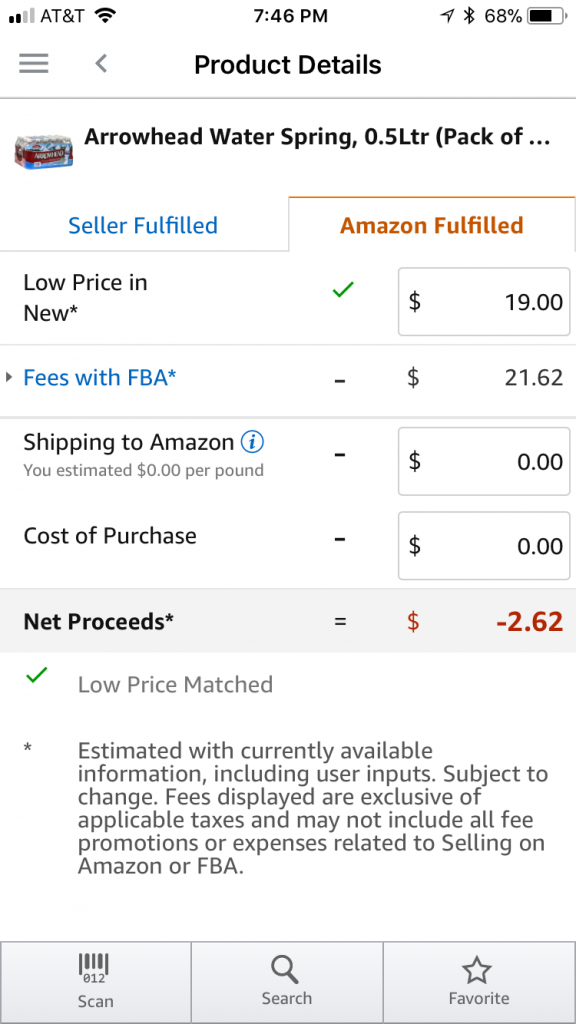
You are then able to adjust the sale price to somewhere mid range. If you adjust to low you may end up driving the other prices down from other sellers which is the last thing you want since these wars can end very badly for everyone and lead to potential losses. I’d try and stay competitive or at the high end so you have room to lower the price later if necessary.
This tab also outlines the FBA fees associated with that item and shipping cost. I usually estimate about 50-75 cents per pound and generally just make a rough guess on the high end for the weight of the item.
After you determine all the fees, make sure to enter the clearance price that you will be purchasing the item for.
Now after all the fields are updated appropriately you will be able to see the estimated total profit. I usually try and aim for no less than the 3-5 dollar profit range so that, if need be, I can drop the price a little bit and still break even or make a buck or two.
So say the item comes out perfectly and you can make $8. Awesome, select that item, throw it in your cart and continue looking. Once you have done this with all your items (I spent about $300 my first time around for a trial period) head to checkout and then jet home for the next step.
Packing and Preparing For Shipment
This is where things get a bit more time consuming and frustrating and is actually the reason I am transitioning away from retail arbitrage completely and moving towards strictly affiliate marketing. However, we will discuss that later. Let’s talk about shipping.
When you fulfill by Amazon you will have to ship all your items to Amazon in what may be separate shipments. I suggest running by Home Depot and buying some 89 cent boxes to ship things in. Remember though, this cuts into your profit margin so unless you are able to find small, light weight items that can be packed and shipped together, you may want to avoid buying boxes, tape, and the like.
I managed to package all my stuff in Home Depot boxes, but here was the problem. When you ship to Amazon FBA they can designate the warehouse they want you to ship to. When I first tried retail arbitrage I didn’t realize this.
So here’s how it went… I purchased boxes from Home Depot based on the dimensions of packing all my items together (separated by item). Got everything home and then moved forward with the preparing for shipment portion of the process.
Once you have scanned your items in and hit “list”, you will then be able to prepare a shipment.
Amazon will not make your listing active until you have shipped all your items to their warehouses and they are checked in. Only at that point will your listings become live and able to be sold.
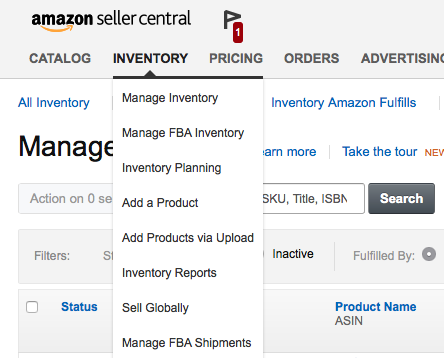
Now go to prepare a new shipment under the inventory page of Amazon’s Seller Central. You should see a screen that looks something like this:
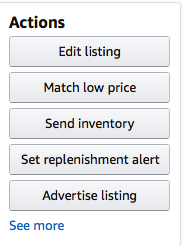
You will need to type in the quantity of items you have, and Amazon will then ask you to ship the items in a particular manner.

After you are done with this step, hit work on this shipment. Here’s where this gets tough. Amazon will tell you specifically which items it wants in the box, and you must print the shipping labels accordingly. I would recommend not sealing anything up until you associate the correct items with their shipping labels.

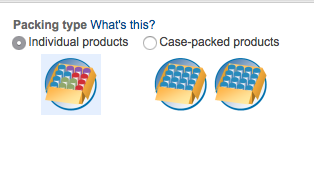
What I realized here is that my Home Depot boxes would not actually fit the items properly without packing peanuts, bubble wrap, or other expensive packing items.
I then headed to the UPS store to pick up dimension specific boxes. When I got to UPS I asked for the boxes in the dimensions needed and to my surprise, it was going to be $27. I said fine because I had spent so much time running around town trying to get everything ready to ship and I had no shipping supplies to begin with. Like I said, I was performing this experiment from scratch.
I realized that this would cut into my prophet margin significantly but I just wanted to get all of this Walmart Clearance junk out of my house (Walmart is pretty gross sometimes, just a heads up).
I packaged everything up and completed the shipment. I attached the associated shipping labels and dropped everything off at the UPS store.

Once shipments are completed Amazon will allow you to track your inventory shipments.
Remember, I selected items based on the criteria that retail arbitragers everywhere have been successful with so they should have no problem selling.
Success So Far
I’m not going to say I’ve had no success and completely bash retail arbitrage. However, there are much more lucrative ways to make money without all the ridiculous effort required.
All of my items sold within a month and I made my money back, but I made sure to track all the hours I spent chasing down items, sourcing, preparing for shipment, and the cost I spent on actual shipping.
It turns out that I made about $6.00 per hour. This could be considered success because I was net positive at all. I don’t see it as a great success. Most Uber drivers claim to make more than this amount, and through affiliate marketing I make closer to $5000/month. There is a huge gap here and I personally don’t see anyone getting rich from retail arbitrage.
My Overall Experience
Retail arbitrage is not meant to make you rich. There simply aren’t enough items on the clearance racks to continually make consistent income. The amount of time it takes to really get through this process, even if you streamline it, is far too much.
What retail arbitrage did do for me is teach me how to use Amazon’s Seller Central. This is fantastic, because for just $340 I now had a full working knowledge of Seller Central and how to sell my own items on Amazon.
Nowadays there are so many resources out there discussing how to sell on Amazon, but you will never truly learn the process until you do it yourself. Since I plan to start my own line of clothing in the near future, understand Amazon is a great skill. However, for the time being, I will stick to the best affiliate platform out there and continue to rake in commissions when folks click on my links.
Also, I still think that becoming an affiliate of Amazon offers more upside and less background work in the long run.
Hopefully this article explained how to get started in retail arbitrage and fully outlined my experience with this side hustle. If you think it might be for you or have any questions, feel free to comment below. If you want to know more about my favorite affiliate site and how I generate a passive online income every month, click the banner.


